Thursday, September 6, 2012

7

I've had a plain white boring 7 on my shelf for a few months and I finally go the inspiration to do something with it :)  A 7, you say, well what's that for?  Well, it's the number of people in my immediate family...our signature I suppose.  I received these wood veneer people in the mail with my MW Express Kit and the lightbulb went on!

Green:  because I love the color!

 
Would make a cute Christmas gift!
 
blessings!
sue


Scrap fabric


Got fabric scraps left over?  I used mine to make this shabby chic lampshade for the girls room!
{inspiration:  Pinterest of course!}
I repainted the base of the lamp (it was black) to tie in with all the beautiful colors.

 
So sweet!
 
blessings!
sue

Tuesday, September 4, 2012

monogram canvas decor

Hi all!  Just popping in to share a little home dec project I did for the girls room!  The girls needed something above their beds and I wanted to do something with their initials.  I purchased some cheap (walmart) canvas boards, added some scrapbook paper, paper doilies, binding tape, ribbon and buttons.  I modge podge everything to the boards and hot glued the buttons on.

Emma's :)

 
Emmy's is pink and turquoise...do u love the chevron paper???
Her canvas is a little more girly.
The little angels came from my friend April.
 
Madi's board is a little more earthy...it fits her personality :)
 
 
Two little girls with such different little attitudes, likes, dislikes....
I really love that they each have a little guardian angel watching them as they sleep.
 
Happy day to you all!
 
sue
 

Saturday, September 1, 2012

Trash-y to treasure!

Ok, so I was at Goodwill (again) and happened upon this {OMG how gaudy is this piece????} little mirrored tray.  Undeterred by the sheer hideousness of it, I set to work.

 
Two coats of satin white spray paint this afternoon and a little bit of antiquing glaze did wonders.  I washed the mirror well and dried it all up.  I thought it still needed something so I added a little metallic chalk to it. 
 
And here she is, ready for some pretty perfume bottles or little girlie trinkets :)
 
 
****************************
 
And these my friends, are all over Pinterest. 
I love them almost as much as I love turquoise paint right now so I decided to
combine the two!


They will each get a little candle inside and grace my Labor Day table :)
 
happy day to you all!
 
sue


Tuesday, June 26, 2012

Carrot Cake Jam

Ok, so I had a bumper crop of carrots from my garden.  I didn't want them to go to waste, so I started searching for recipes.   I've already made 4 loaves of carrot bread, one big old carrot cake {that our Sunday School class gobbled up and I'm making another one today :)} and last night I busted out my canner to make....

CARROT CAKE JAM!
Doesn't that sound delicious?

It was super easy to make...getting all the jars together was probably the most time consuming part!


Big old bowl of carrots...had to grate them all up!


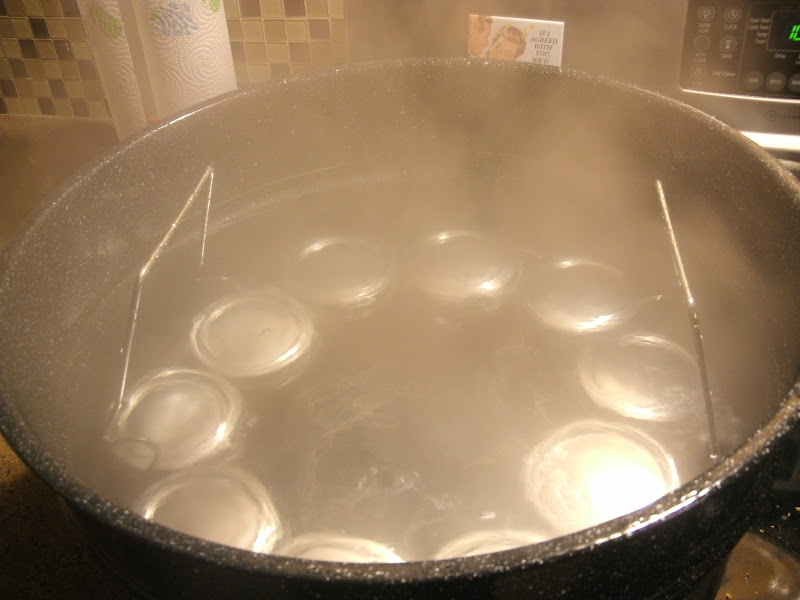
Into the water bath for processing!


= 10 delicious jars of jam!

Can't wait to taste it...so happy all my jars sealed!

If you'd like to make some...here's the recipe!

Carrot Cake Jam

2 cups finely shredded carrots
1 cup finely chopped and peeled pear
1 15 ounce can of crushed pineapple (juice pack, undrained)
2 T lemon juice
1 tsp ground cinnamon
1/2 tsp ground nutmeg
1 1.75 ounce pkg of fruit pectin
4 cups granulate sugar
2 cups packed brown sugar
1/4 cup raisins or flaked coconut (optional)
1 tsp vanilla

Combine carrots, pear, pineapple, lemon juice, cinnamon and nutmeg in 4-6 quart pot.  Bring to boil, reduce heat and simmer for 20 minutes.
Remove from heat and stir in pectin until completely dissolved.
Bring mixture to boil, add sugars. 
Return to full rolling boil, boil for one minute.
Skim off foam with metal spoon
Stir in coconuts/raisins and vanilla.
Ladle into jars, leaving 1/4 inch headspace.
Process in water canner for 10 minutes.
Makes 7 half pints.

Enjoy!
Recipe is from BHG Canning magazine!

happy day!

Sue

Friday, June 15, 2012

Doodle Lampshade

I needed a reading lamp for over my reading chair.  Not a whole lot of choices out there, so I went with the simplest (cheapest!) one I could find.  It came with a plain white plastic lampshade.  Ugh.


That's ok, though, because I have Sharpie markers and paint.  A little while sitting at the kitchen counter and I had hand doodled and painted the shade into this....


Ha ha!  Cute and funky. 
After I did it, I thought about all the other ways I could have decorated it.  Stamped it?
Anyhow, no matter...Emma loves it and it adds a little quirkiness to my reading spot!

happy creating to you!

Sue

Monday, June 11, 2012

Scrapping 6 x 6

i adore scrapping 6x6 layouts.  Generally, they are easier to do, they come together quicker, and the finished product doesn't take up tons of room!  Plus, you can replicate them pretty quickly and they make great X-mas gifts for the grandparents!!!

I have been utilizing my new MW goodies....and since four kiddo's have barely nothing scrapped for them in the pasty, oh, ummm...2 years?  I figured I should get to work!

Here's what I was up to!


Sam's Layout:


 Emma's Layout:


Madison's Layout


I also entered this layout in the MW Week 2 Challenge. 
You had to use a flower, and something metal.
As you can see below, I used a metal flower!


Jacob's Layout


I also entered this in the challenge. The flower is a punched and layered flower underneath the bottlecap (my metal).  I machine stitched swirls on this layout as well.  Really, the challenge was about adding embellishments to your layouts...so I think mine qualify!

I chose 6x6 layouts because I am making mini albums of my favorite pics of the year for each kid.
I have some doozy pics (see Sam's!)


It was actually pretty nice to just lock myself into the craft room and work on some projects.  Haven't done that in a while!

Happy Crafting to ya!

Sue

birdhouses

Hi All!

Well, last weeks Summer Kids activities went a little haywire, but I'm back this week to share some fun ideas to keep your kids occupied for the summer and have a great time!

I purchased some small pre made birdhouses at Walmart for $2.77 each and st up a container of paintbrushes and leftover paints on styrofoam trays.

The kids each got a birdhouse to paint...


The key to this project is to not PANIC about the paint!
Lol, now I'm  a little bit of a clean freak, but my old standby is
a good old vinyl tablecloth.  With four kids at home, I need something cheap that I can
change out if it's destroyed.  I change them from season to season, holiday to holiday, you name it.


Madison went with the "orange flame" look.
I swore that the birdhouses were all going to end up a
muddy brown color!


We'll call Sam's creation a "key lime" color!


Jacob went with a multitude of colors,


and Emmy went with a "rainbow" roof look.
All beautiful!
Here they all are, drying on the countertop.
All we have to do is drill some small holes in the top to add string to hang.
Emma wants to hang them all in one tree!


This was an inexpensive, eco friendly project that
kept the kids occupied and the birdies happy!

Happy Crafting!

Sue

Wednesday, June 6, 2012

Memory Works Challenges

June Challenges


This month over at MemoryWorks, they are celebrating their 10th birthday!  They have a whole month full of challenges to choose from.  These are my submissions for the month!


Birthday Card Challenge:


Been away from papercrafting tooooooo long!

blessings!

sue

Mobile's

Last months issue of Scrapbooking, etc left me itching to make something for the girls room yesterday.  The space above their headboards is lacking so I decided to make some mobiles to suspend from the ceiling.  :)

Emma's is made from scalloped flowers..i tried to replicate the mobile from the magazine...the hardest part was decorating the frame it's suspended on!


I added these letter beads, simply tied onto the ends of the strings, to weight them down.


Madison's mobile is birdie-inspired!

Hand cut birdies, each a little bit different with "heart" wings!


Sweet birdies sprinkled with scalloped circles.
All suspended on bamboo skewers! 
Easy and it add's a little whimsy to their rooms!


Blessings!

sue


Wednesday, May 30, 2012

Summer Kids Series: Free For All Week!

Welcome to Day 2 of our Summer Kid Series!  This morning we awoke to sunny skies (hooray!).   We did our morning calender on the kitchen blackboard...discussing the weather, the date and shapes.  Emma decided to do an impromptu lesson on coins...lol!

We are also starting to learn a new prayer about being kind and good. 

It goes like this:

Help me to be kind and good,
To always do the things I should:
Give me wisdom from above,
To share with others God's great love.

from Praise and Worship by Angela and Ken Abraham.

*******************************************************

Our project today was ROBOTS!

For this you will need:

tp rolls
pipecleaners
beads
a hole punch
tinfoil
glue dots


After doing this project, it is definitely easier for a 6-7 year old range!
Lol! 


To make the robot body, roll aluminum foil around the tp roll and tuck in the ends.
We then used glue dots and eyes and beads to make our faces.


We made arms by punching two holes as far down as we could on both sides of the tube.  We threaded pipecleaners through and added beads for decoration.  Just skip the end bead and weave your pipecleaner back through to secure the beads.


We punched six holes in the top and criss-crossed pipecleaners through the holes.
A little twist around a pencil and we had curls!

Hope you enjoyed today's project!

We will be making lemon freeze pops later...I will share the recipe tomorrow!

have a wonderful day!

sue


Tuesday, May 29, 2012

Free for All Craft Week: Day 1

Hello all!  Well, today in Statesboro, GA brought rain, rain and more rain!  Since it was pretty dreary out, we needed to find some fun crafts.  We ended up doing more crafts today because it was rainy.  That's ok though.  It's all about being flexible!

Rainbow Paper Plate Craft


For this craft you need half a paper plate, 6 streamers or ribbon in rainbow colors,
cottonballs, glue, and a stapler.

Steps:

1.  Cut paper plate in half.
2.  Apply glue and have kids stick the cottonballs all over to make a cloud.
3.  Staple or glue your ribbons to the bottom of the plate.
4.  Add a stringhanger.

They will help brighten up a dreary day!


Here's Madi showing off her masterpiece!


Next we made hang puppets our of small white paper bags.

Items needed:
Small white paper bags
Markers
yarn/eyes/fuzzy yarn balls

Super easy and they can be as creative as they want!


We had a little puppet show, which pretty much consisted of my kids
giggling their butts off.

Oh well, I tried!

Last, we made fish (this was Jacob's idea)


All you do is cut a triangle out of a paper plate and glue/staple it to the back.  Add and eye and let the kids decorate as they want.  You could add macaroni for gills, glitter...you name it. 

No matter what you do, the goal is to have fun with your kids.
I was happy to see my kids gathered together being creative and
having fun at our table. 


Happy Creating to you!
Hope to see you tomorrow!

sue


Cheap craft items to have on hand

With 4 kids, I'm thrifty.  LOL.  Here's a list of some craft items I keep on hand.  Most can be found at the dollar store.

Chenille stems
paper plates
cardboard tubes/tp tubes
egg cartons
newspaper
different size food boxes
balloons
string
paint
modeling clay
molds
cottonballs
rocks
yarn
buttons
leftover pieces of wood
aluminum foil
beans/pasta
milk jugs/juice cartons

It's amazing what you can make with what some people might call garbage!  Take a look at what you are throwing away and stop to think if you can make a project out of it. 


blessings!

sue

Summer Kids Series

Hi all!  Welcome to my little version of "what to do with your kids all summer!"  If you don't know, I have four little one's at home, all under the age of 7.  That can create a little challenge over the summer to keep them occupied and also not lose sight of educational opportunities while out of traditional school. 

Since my kids range in age from 2 to 7 years old, I tried to find some crafts and activities that they could all enjoy.  Some projects require adult intervention, but for the most part, I just let them be creative. 

My first step was kind of planning themes for the summer weeks.  I chose:

     *Free for all!
     *Beach
     *Garden
     *Animals
     *Food

Inside of each week, I'm going to try to stick to somewhat of a schedule for the day.  Still flexible, but keeps it more organized.  Our day goes like this:

Wake up!  and breakfast time.  If the kids can help prepare their meal, hooray!
Calender/weather time (I have a big old chalkboard painted on my kitchen wall for this!)
Daily craft (I'll share these with you as we move through the weeks)
Day trip  (I've explored local spots that we can incorporate into our weekly themes)
Free time:  this can be for coloring, painting, reading, swimming..you name it!
Dessert prep (hoping to make some desserts to have AFTER supper!)
Story time
 

I've planned different projects, day trips, stories and movies for week.  I'll encourage you check our local libraries, ours runs a Summer Reading program so we have a plan for every Thursday.  We still have left the schedule pretty flexible so we can change it up if we need to. 

I'd love to hear what you are doing with your kids this summer! 

I hope you'll tune in each day to see what we are up to and to share your summer activities!

blessings!

Sue


Monday, May 28, 2012

in the garden....


Our garden is blooming!  I am especially in love with the sunflowers..big old floppy heads, so cheerful!  The one in the pic above is about 9 ft tall!


This one has lots of flowers!  I am going to plant a whole row of sunflowers in my garden next year
because they are super easy to grow and I just love them.


Catnip on the right....cats can't wait till this is dried...this was a little quart sized plant about a month ago...has grown tremendously!


Knock out roses...love em!


My cilantro has gone to seed....I could eat this with anything!


Mints gone wild!


Cucumbers are starting to grow...gonna make a big old pickle jar!


These little guys somehow ended up in my deck flowerbeds.  I let them be and just pick em as I need them.  LOL


Growing alongside the tomatoes....


The kittens....from Monkey....our adopted stray who came with the house!
One of the pure white kittens has a blue and a green eye.  I think she's deaf. 
I had an identical cat as a child, and he was deaf.  I think it's a genetic thing.
They are so funny...they climb the trees and live in the shed and frolic around in the woods.


What's growing in your garden?

xoxo

sue